Showing posts with label crochet square. Show all posts

Saturday, February 6, 2016

Welcome to Hook & Petal

Wooly Ana's Crochet has had a make over! 
Meet Wooly Ana's Hook & Petal! I'm hoping a more precise focus to the blog will help me and it feel less scattered. 

I want to start this new version of my blog by going back to the Jacinta flower. This is a pattern I wrote to honor my stillborn daughter Jacinta.  My hope is that eventually this pattern will become as widespread as the African flower or the Maybelle flower so I will continue to share it periodically in hopes that more and more people will make it.

When I first made the flower I did it in a solid color, later I discovered that it makes a delightful multicolored flower as well. 

Here is a tutorial including the color changes:

You will need 3-4 different color yarns

Chain 6, join with slip st to form a ring.


Color 1

RND 1: Ch 3 (counts as first dc), 15 dc in 

ring; join with slip st to first dc. (16 dc totals)


Color 2
RND 2: Ch 1, sc in same st, ch 3, skip next dc, *sc in next dc, ch 3, skip next dc; repeat from* 6 more times; end with slip st in first sc. (8 ch-3 spaces).


RND 3: Ch 1, sc in same st, (2 sc, ch 3, 2 sc) in next ch-3 space, *sc in next sc (2 sc, ch 3, 2 sc) in next ch-3 sp * repeat from * 6 more times; end with slip st in first sc. (8 ch-3 spaces)


Color 3
RND 4: Ch 1, sc in same sc, dc in next ch-3 space, (ch 1, dc in same sp) 4 times, skip next 2 sc, *sc in next sc, dc in next ch-3 sp, (ch 1, dc in same sp) 4 times, skip next 2 sc* repeat from * 6 more times; end with slip st in first sc. (8 flower petals)


Either continue with color 3 as I have here or switch to color 4
RND 5: Slip st into next dc, slip st in next 1-ch space, ch 1, sc in same ch-1 space, ch 3, sc in next ch-1 sp, (ch 3, sc in next 1-ch sp) 2 times *skip next (dc, sc, dc), sc in next 1-ch space, (ch 3, sc in next 1-ch sp) 3 times* repeat from * 6 more times; slip st in first sc. (24 ch-3 spaces)


Your Jacinta flower is done but here is the down side of a multicolored flower - all the damned ends that need to be woven in! 

But they are so pretty you will certainly forgive them for all the trouble.

After you are done you will of course want to do a photo shoot!


I made some beautiful cushion covers with them by turning them into squares.


Hope you enjoy making these flowers as much as I do!
Thanks for visiting!


Tuesday, September 16, 2014

Jacinta Flower Hot Water Bottle Cover

Our little house in the big woods is sweet as hell and I love her to bits but she is also old, drafty and uninsulated. Also, propane is expensive, so needless to say, we like to find alternative ways of staying warm. Cuddling, layers, and drinking tea only helps so much so we rely heavily on hot water bottles here. 

This year I have decided to make a unique water bottle cover for each member of the family. I'm starting with myself, not because I am selfish or anything but because I need to make a test one.

This isn't really a tutorial, it's more of a brief description of what I did. 

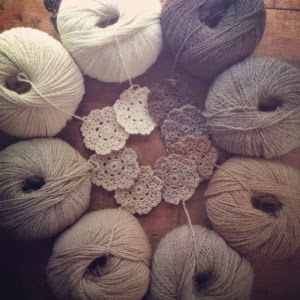
I started with these beautiful brown Jacinta Flowers


Then I made them into squares.


I used Knit Picks palette yarn which is a fingering weight 100% wool with a B hook.


Here is where you will need to test your squares on the hot water bottle you are using. I have many and they are slightly different sizes. 

Once all your squares are made you can start attaching them. I used a classic join, the single crochet in the back loop only. Simple and neat.


I then crocheted a hdc border around each side, making it big enough to cover the entire hot water bottle. 


I ended up having to make an uneven border to get it to fit, but I'm perfecting it. Crafting is a process.


Then you can join each side. Again, I used the back loop only single crochet.


I left a gap on the bottom to accommodate little hang thingie on the bottom of some hot water bottles.


I continued to crochet the top and ended with a scalloped edge.


I finished off by attaching a cord and a couple of pom poms.  


I'm ready for the cold weather.


Sunday, September 14, 2014

Jacinta Flower Square Motif

A crochet flower is nice but a crochet flower that you can make into a square motif is even better. 

This is a detailed tutorial. Click here for a PDF of the pattern itself.

First you start with a Jacinta Flower.


Round 1
Insert your needle into the space between two petals.


Attach yarn.


Chain 3,


Skip first ch-3 space, sc in next ch-3 space, (This is the ch-3 space in the center of the petal)


Chain 3,


Skip ch-3 space, sc in space between petals,


Continue to chain 3, sc in center ch-3 space, chain 3, sc in space between petals . . . 


all the way . . .


around.


Round 2

Chain 3,


*3 hdc in ch-3 space,


hdc in next sc,


Work (1hdc and 2dc) in next ch-3 space,


Work (tr, ch 2, tr) in next stitch. This is the corner of your square!


Work (2dc, 1hdc) in next ch-3 space,


hdc in next stitch,


3 hdc in next ch-3 space.


hdc in next stitch.


Continue from * around the entire flower


 End with a slip stitch in the first stitch.


Round 3:
Ch 3,


Dc next 8 stitches,


Work (dc, ch2, dc) into next ch-2 space to make corner,


continue to work a dc into each stitch around and . . .


a (dc, ch 2, dc) into each corner.


All the way around


Ending with a slip stitch in the first st.


Finish off


Then you repeat this process over and over again.


I tried it with various colored borders. The brown and white are my favorites but I like them all. They each have their own personality. 


I also made some monochromic ones. I love these!!!!


Then I used them to make a special little blanket and pillow set for Trixie's babies.